Like :
How do you do this?
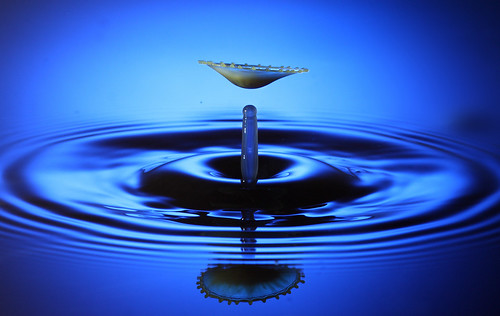
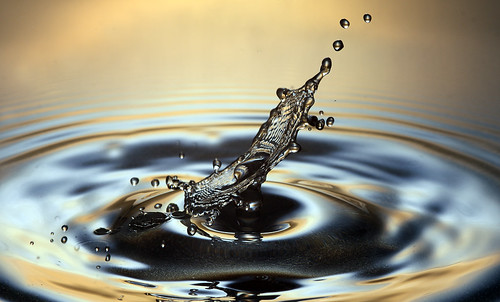
What you need is to have the light smooth and graduated and well dispersed behind the drop so that from most angles the water refracts the light back to the camera. It helps to have a spread of colours so that different parts of the ripples refract different coloured light so that the ripples have substance.
1). Make sure your drops are hitting your pool of water (pref something like a baking tray) near the middle.
2). Have a diffuser at the back (I use frosted perspex/acrylic)
3). Have your flashes behind the perspex with whatever colours you wish to try.
4). Aim at the splash site so that you are angled down slightly so the top of your splash spout is below the 'horizon' caused by the back of the cookie tray, leave enough space in front for a reflection.
Different effects can be created by using different setups.
1). One flash pointing down another directly on top of it pointing at the top of the diffuser, black dye in the water
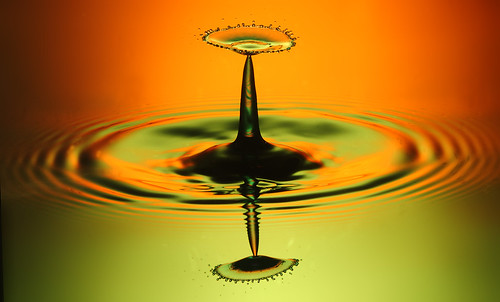
2). One flash pointing at each side of the diffuser - Just plain water
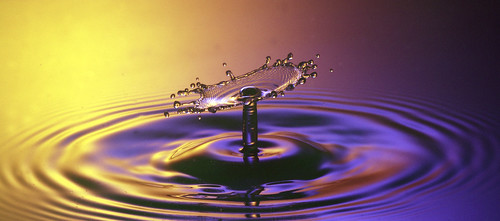
3). One flash with gel, one without
Reflections..
To get reflections you need to have still water. I hold a cup under the stream of drops and let the water calm so it's completely smooth, trigger the camera and then move the cup away and try to capture the first drops hitting so the only ripples are from the initial impact. It takes practice!!
One final thing.. Any marks, water splashes or similar on your diffuser will reflect on the water and show up on your image. Keep it clean and out of the way of kids :)
Whether or not I ever have the patience, is another matter. You are a world authority on a fascinating subject. The images are just brilliant, thanks.
ReplyDeleteI am happy that you are sharing your expertise on this. However, I would like to comment that your photos are consistently underexposed and suffer from severe light falloff. This might be an artistic decision, or due to an uncalibrated monitor. I think correcting the exposure would take your photos to another level.
ReplyDeleteWow! Awesome. And I thought shots like this were done only by chance. Thanks for the lesson.
ReplyDeletetq very much
ReplyDeleteBrilliant photography.
ReplyDeleteGreat tutorial. Thank you.
ReplyDeleteYour blog has inspired me to try this as well. So far, my results are not nearly as good as yours, but it sure makes fun during the winter evenings....
ReplyDeleteThanks for sharing your knowledge.
Your photography is wonderful, but I am not clear how you time your shots. Some people use a light beam trigger that sets off the flash when the drop goes through it. - A sound trigger is also possible, but difficult because drops don't make much of a sound.
ReplyDeleteMost recently I built a photogate trigger (www.hiviz.com) however almost all the images from october back were taken by triggering the flash by hand.
ReplyDeleteThanks for your blog. If you haven't see him already, check this out: http://www.pbase.com/fotoopa
ReplyDeleteHispeed, laser triggered macro photography, including 3D stereo drips. Pretty extreme but amazing nonetheless.
well done, i think this is brill, i will be trying this my self as soon as can. very good, thanks
ReplyDeleteExcellent !
ReplyDeleteAbsolutely fantastic tutorial, thank you for sharing,
ReplyDelete